I wanted to add a rim light to an asset and have it show at any arbitrary camera angle. This is what I came up with:
You can get slightly different results by replacing the CameraDirectionVector with a Camera Vector (and reversing the rotator) but from my testing, the CDV had more appealing results on complex geometry.
Saturday, July 29, 2017
Wednesday, May 10, 2017
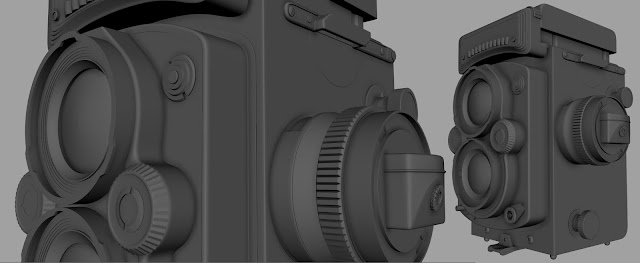
Rolleiflex camera model
I decided to model something hard surface that will show off PBR and chose this beautiful camera.
 High Poly

Low Poly / Bake / Masks
Materials (minus the text, going to make new UVs for that)
I'm pretty happy with everything except for the clear plastic on the light sensor, and especially the focus knob. It's very thick, and I'm not sure how to create that quality in the material. I imagine to make it look right you'd have to use two meshes, but beyond that a solution is currently over my head.
My folder containing all of the work for this seems to have disappeared while transferring it to an external drive. I had a WIP contact sheet made but I never finished the final lighting or short video (similar to the KSBD asset) that I had planned since I got caught up with moving for a job.
So here's the last image for the camera:
 High Poly
Low Poly / Bake / Masks
Materials (minus the text, going to make new UVs for that)
I'm pretty happy with everything except for the clear plastic on the light sensor, and especially the focus knob. It's very thick, and I'm not sure how to create that quality in the material. I imagine to make it look right you'd have to use two meshes, but beyond that a solution is currently over my head.
My folder containing all of the work for this seems to have disappeared while transferring it to an external drive. I had a WIP contact sheet made but I never finished the final lighting or short video (similar to the KSBD asset) that I had planned since I got caught up with moving for a job.
So here's the last image for the camera:
Saturday, April 29, 2017
UE4: Paper Burn effect
A commenter on my YouTube channel asked about a paper burning effect so I decided to make one.
 The Divide in the video was taken out for the screen shot. That was something I didn't catch while prototyping. (There's no need for stair-stepped values because it's all going through a Floor anyway)
I also removed the extra Floor and added a Clamp to stop negative numbers from affecting the emissive.
After making the burn effect, I realized it was similar to a great effect I saw in a GDC presentation about Substance Designer. Here's what I came up with for that, though I imagine there are better ways to achieve it.
(any of the gradients can be replaced with a Levels adjustment so if you don't want the extra utility of offsetting the age your graph can just be a Blend and a Levels)
Subscribe to:
Comments (Atom)


